
Understanding Vapor Barrier Installation
Vapor barriers play a crucial role in maintaining the integrity of your home, particularly in areas with crawl spaces. Understanding the process of Vapor Barrier Installation can help you protect your property from moisture damage effectively. In this guide, we will peel back the layers to uncover what vapor barriers are, their importance, and how they are installed. Additionally, we’ll provide the best practices and solutions to common challenges associated with their installation.
What is a Vapor Barrier?
A vapor barrier is a material designed to restrict moisture from penetrating through walls, floors, or ceilings. Typically made of polyethylene or other plastic sheeting, it serves as a protective barrier against moisture that can contribute to mold growth, wood rot, and structural damage. The barrier’s effectiveness lies in its ability to provide a waterproof seal, preventing humidity and water vapor from infiltrating living spaces, which is especially critical in basements and crawl spaces.
Importance of Vapor Barrier Installation
Installing a vapor barrier is critical for several reasons:
- Mold Prevention: Excess moisture leads to mold growth, which poses health risks. A vapor barrier can significantly reduce the risk of mold and mildew.
- Structural Integrity: Moisture can lead to wood decay and compromise the foundation of your home. A vapor barrier helps maintain the structural integrity of your property.
- Energy Efficiency: When moisture is effectively managed, homes can maintain a more stable temperature, reducing heating and cooling costs.
Common Materials for Vapor Barriers
Vapor barriers can be made from various materials, but the most common include:
- Polyethylene Plastic Sheeting: This material is most commonly used due to its affordability and effectiveness.
- Foil Face Barriers: These barriers reflect heat and provide added thermal resistance.
- Paintable Vapor Barrier Coatings: These coatings can be applied directly to surfaces and are useful in areas where traditional sheets may be impractical.
Step-by-Step Vapor Barrier Installation Process
Preparing the Crawl Space
The first step in the installation process is to prepare the crawl space. Here’s how:
- Clear the Area: Remove any debris, old insulation, or obstacles from the crawl space.
- Inspect for Mold: Check for any signs of mold or dampness, addressing these issues before proceeding with the installation.
- Level the Ground: Ensure the ground is level to provide an even surface for the vapor barrier.
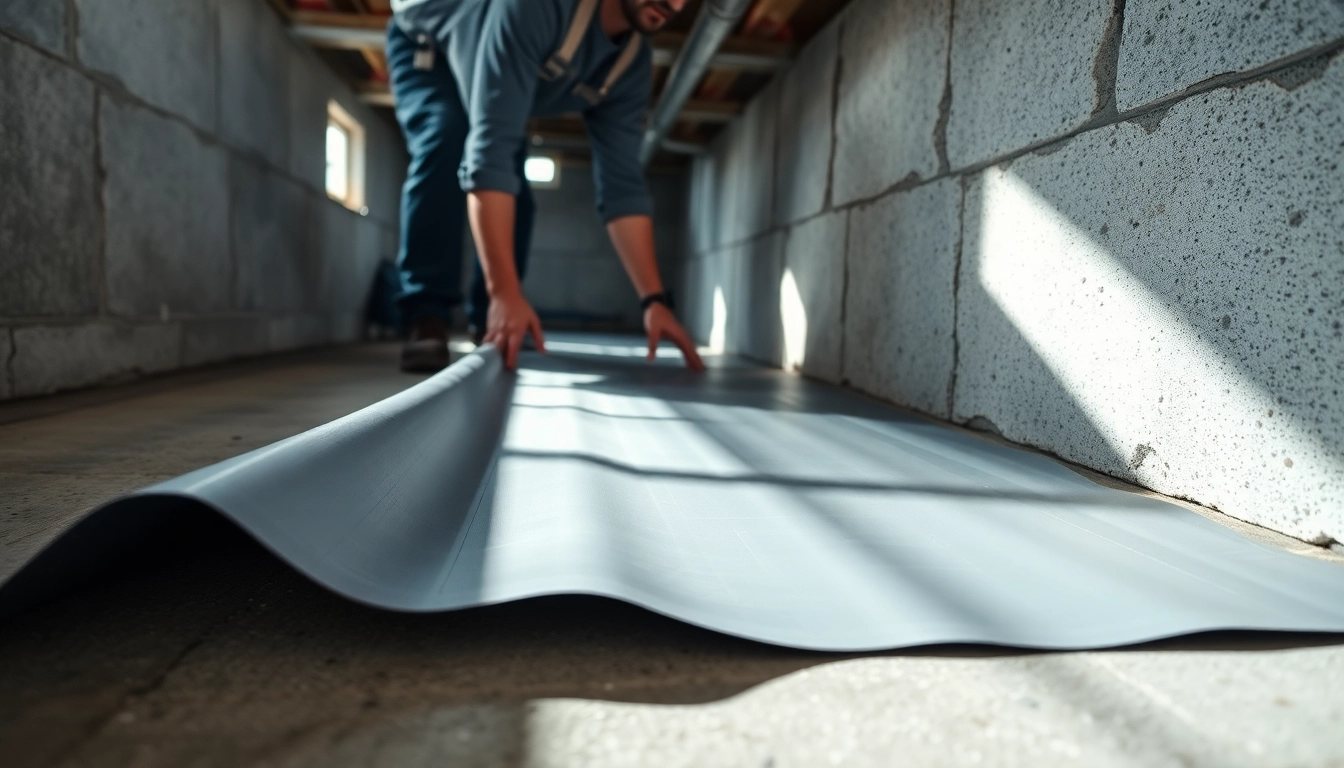
Laying Down the Vapor Barrier
Once the crawl space is prepared, you can proceed with laying down the vapor barrier:
- Measure and Cut: Measure the size of the crawl space and cut the vapor barrier material accordingly, allowing for some overlap on the edges.
- Lay Down the Barrier: Place the barrier across the ground, ensuring it covers the entire area.
- Overlap Seams: Overlap seams by at least 12 inches and secure them with tape to ensure no moisture seeps through.
Sealing and Finishing Touches
After laying down the vapor barrier, it’s time to seal it properly:
- Secure Edges: Use adhesive or spray foam to secure the edges to the walls, preventing moisture from seeping underneath.
- Inspect for Gaps: Double-check for any gaps or holes, sealing as necessary.
- Final Review: Inspect the entire installation to ensure proper coverage and sealing.
Best Practices for Vapor Barrier Installation
Choosing the Right Thickness
The thickness of the vapor barrier material is crucial. Commonly, a thickness of 6 mils is recommended for standard applications. However, in areas susceptible to heavy moisture, thicker options (10-20 mils) provide enhanced durability and protection against punctures and tears.
Ensuring Proper Sealing Techniques
To achieve the best moisture protection, proper sealing techniques are necessary:
- Use high-quality tape specifically designed for vapor barriers to seal seams.
- Implement adhesive sealants at the barrier’s edges for additional security.
Maintaining Crawl Space Conditions
Post-installation maintenance is equally important. Regularly check the crawl space for signs of moisture or degradation in the vapor barrier. Schedule annual inspections to ensure the integrity of the barrier is maintained, and make repairs promptly as needed.
Common Challenges in Vapor Barrier Installation
Addressing Moisture Issues
Even with a vapor barrier, you may encounter moisture issues. Consider integrating additional solutions such as dehumidifiers or drainage systems to manage humidity levels effectively.
Dealing with Uneven Surfaces
If the crawl space has uneven surfaces, it’s important to fill in low spots with gravel or soil before laying down the vapor barrier. This promotes better coverage and prevents tears in the material.
Overcoming Installation Errors
Common mistakes during installation can lead to inefficiencies. Ensure all seams are properly overlapped and taped, and that edges are well sealed. Conducting a final walkthrough can help catch errors before they become larger issues.
FAQs about Vapor Barrier Installation
What are the signs I need a vapor barrier?
If you notice dampness, mold growth, or strong odors in your crawl space, it’s time to consider a vapor barrier installation.
How thick should a vapor barrier be?
Generally, a thickness of 6 mils is recommended, but thicker options (10-20 mils) offer better durability and protection.
Can I install a vapor barrier myself?
Yes, but ensure you have proper guidance and tools. Professional installation can guarantee long-lasting results.
How do I maintain my vapor barrier?
Regularly check for tears or damage, and ensure the crawl space remains dry and ventilated to maximize efficacy.
Is a vapor barrier necessary in all climates?
While it’s essential in humid areas, other climates may not require it unless moisture issues are present. Consult a local expert.


